Install & Setup Guide
Setup takes about 15 minutes with both phones in hand. Each step below is one line. If a step is not obvious, open “Show me exactly how” under it for the detailed walkthrough.
Before you start
- Your phone and your child’s Android phone, both charged and online.
- Your child, ideally. NestPatrol is visible by design. Telling them first works better than them finding it.
- About 15 minutes.
Step 1. Install the Parent App on your phone
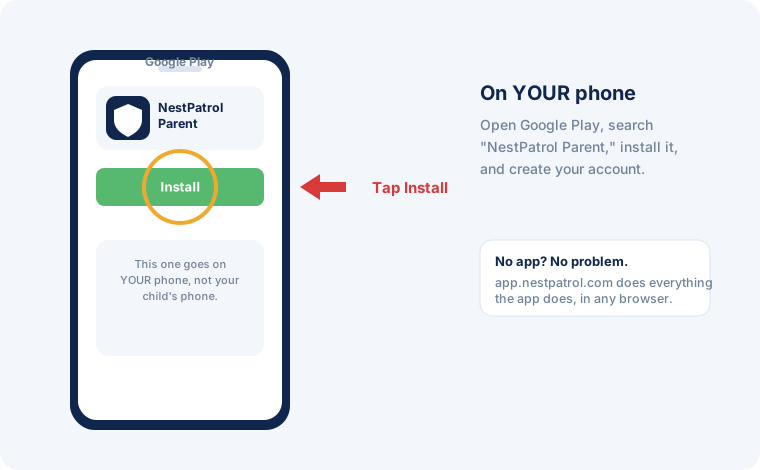
Get NestPatrol Parent on Google Play, or skip the app and use app.nestpatrol.com in any browser.
Show me exactly how
Open Google Play on your own phone, search for “NestPatrol Parent,” and tap Install. Open the app and choose Create account. Use an email address you check often, because safety alerts and SOS notifications go there too. If you prefer working on a computer, everything the app does is also at app.nestpatrol.com. The Kids App is still required on your child’s phone either way.
Step 2. Add your child and get an enrollment code
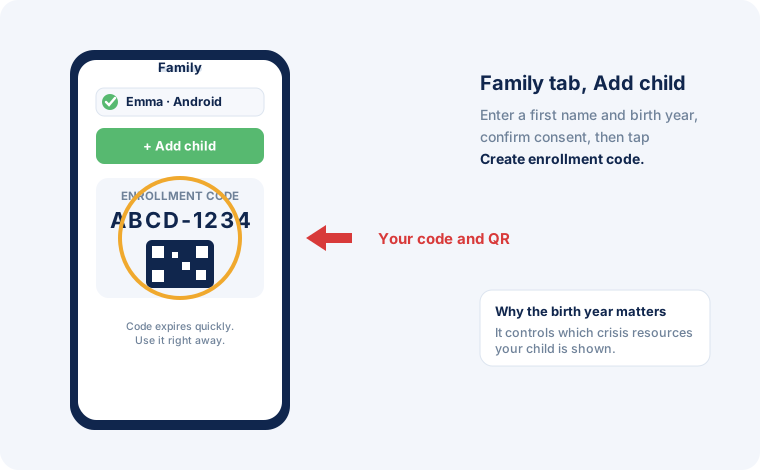
In the Parent App: Family > Add child, then Create enrollment code.
Show me exactly how
Open the Family tab at the bottom. Tap Add child, enter a first name and birth year, and confirm parental consent when asked. The birth year matters: it controls which crisis resources your child can see, so younger children are not shown resources meant for teens. Then tap Create enrollment code. You get a short code and a QR code. The code expires quickly, so do Step 3 right away. If it expires, make a new one; nothing breaks.
Step 3. Install the Kids App on your child’s phone
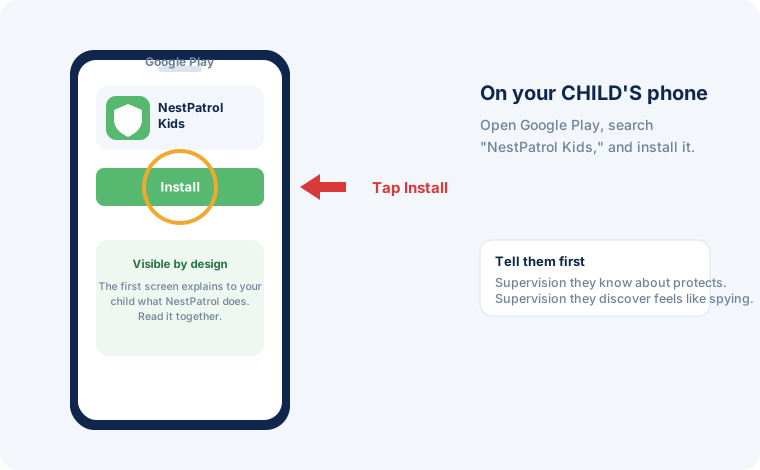
Get NestPatrol Kids on Google Play on the child’s phone.
Show me exactly how
On your child’s phone, open Google Play, search for “NestPatrol Kids,” and install it. Open the app. The first screen explains, in words meant for your child, what NestPatrol does and what you will be able to see. Read it together if you can. This is the conversation that makes everything after it easier.
Step 4. Connect the two phones
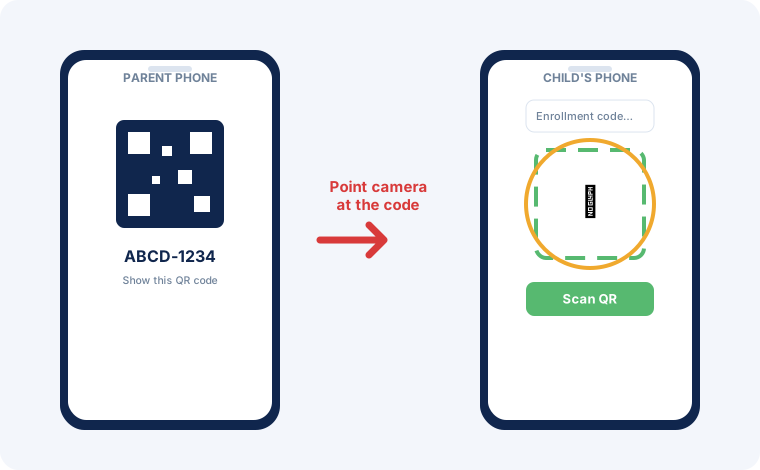
On the child’s phone, scan the QR code from your phone, or type the code.
Show me exactly how
On the child’s phone, tap the QR button next to the code box and point the camera at the code on your phone. Typing the code works exactly the same. When it connects, the child’s phone shows “Connected” with the child’s name, and the guided setup begins. If the code is rejected, it probably expired; create a fresh one in the Parent App and try again.
Step 5. Follow the guided setup on the child’s phone
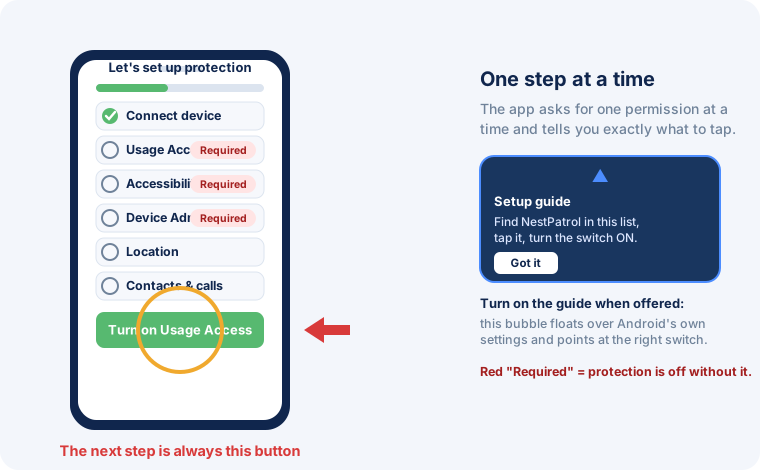
The app walks you through each permission, one step at a time. Do the three Required steps at minimum.
Show me exactly how
After connecting, the Kids App shows a setup checklist. It asks for one thing at a time and tells you exactly what to tap. Turn on the setup guide when offered: a small helper bubble then floats over each Android settings screen and points at the right switch, which matters because every phone brand hides these settings somewhere different.
Required, protection does not work without these three: Usage Access (screen-time limits), Accessibility (website filtering and tamper protection), and Device Admin (stops the app being removed without you).
Recommended: Location (for emergencies and geofences), App notifications, Battery optimization exemption (so Android does not put protection to sleep), Notification access (rule updates), and Contacts and call protection (shares the phone’s contact list to your dashboard and screens calls).
The wizard will not say “Protection is on” until the required three are granted, and it comes back on its own if one of them is ever switched off later. Note: if Google Family Link supervises this phone, it can block the call-protection step; remove Family Link supervision first, then re-add it afterwards if you use both.
Step 6. Set your first rules
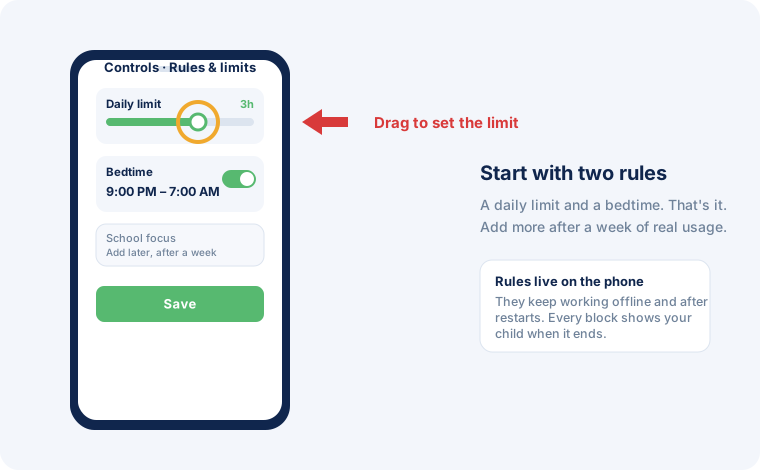
Back on your phone: Protection > Screen Time. Start with a daily limit and a bedtime.
Show me exactly how
Open the Protection tab, switch to Screen Time, and pick your child. Set a daily screen-time limit and a bedtime window first; they are the two rules families actually keep. School focus lives in the same Screen Time section; per-app blocking is under Apps & Web, and geofences are under Location. Every block tells your child when it ends, and calls keep working during blocks.
Step 7. Test that protection is real
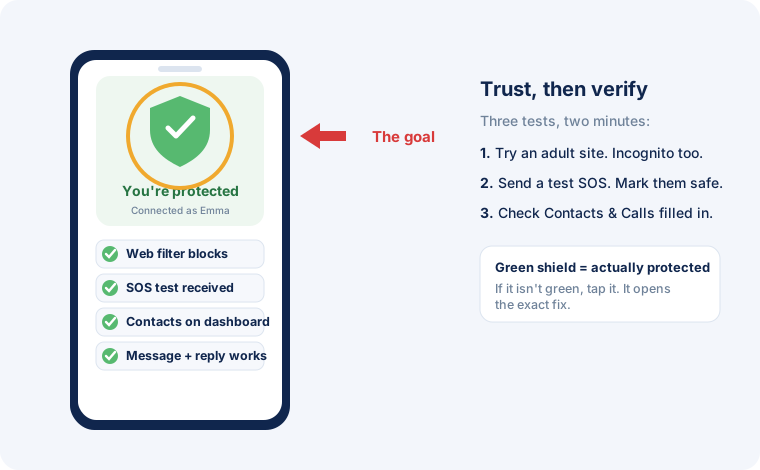
Three quick tests: the shield, a website, and an SOS.
Show me exactly how
On the child’s phone, the Home screen shield should say “You’re protected.” In the phone’s browser, try an adult site; it should not load, including in private or incognito mode. Then have your child press and send a test Emergency SOS. Your phone should get the alert within moments, with their location; acknowledge it and mark them safe. Finally, open your dashboard and check Contacts & Calls shows their contact list. If any test fails, the Support page has the fix for each one.